Tutorials › 1
Your first job: the demo sign
Open the ready-made sign project, see how a job fits together, simulate it and export G-code your controller can run.
-
Open the demo sign
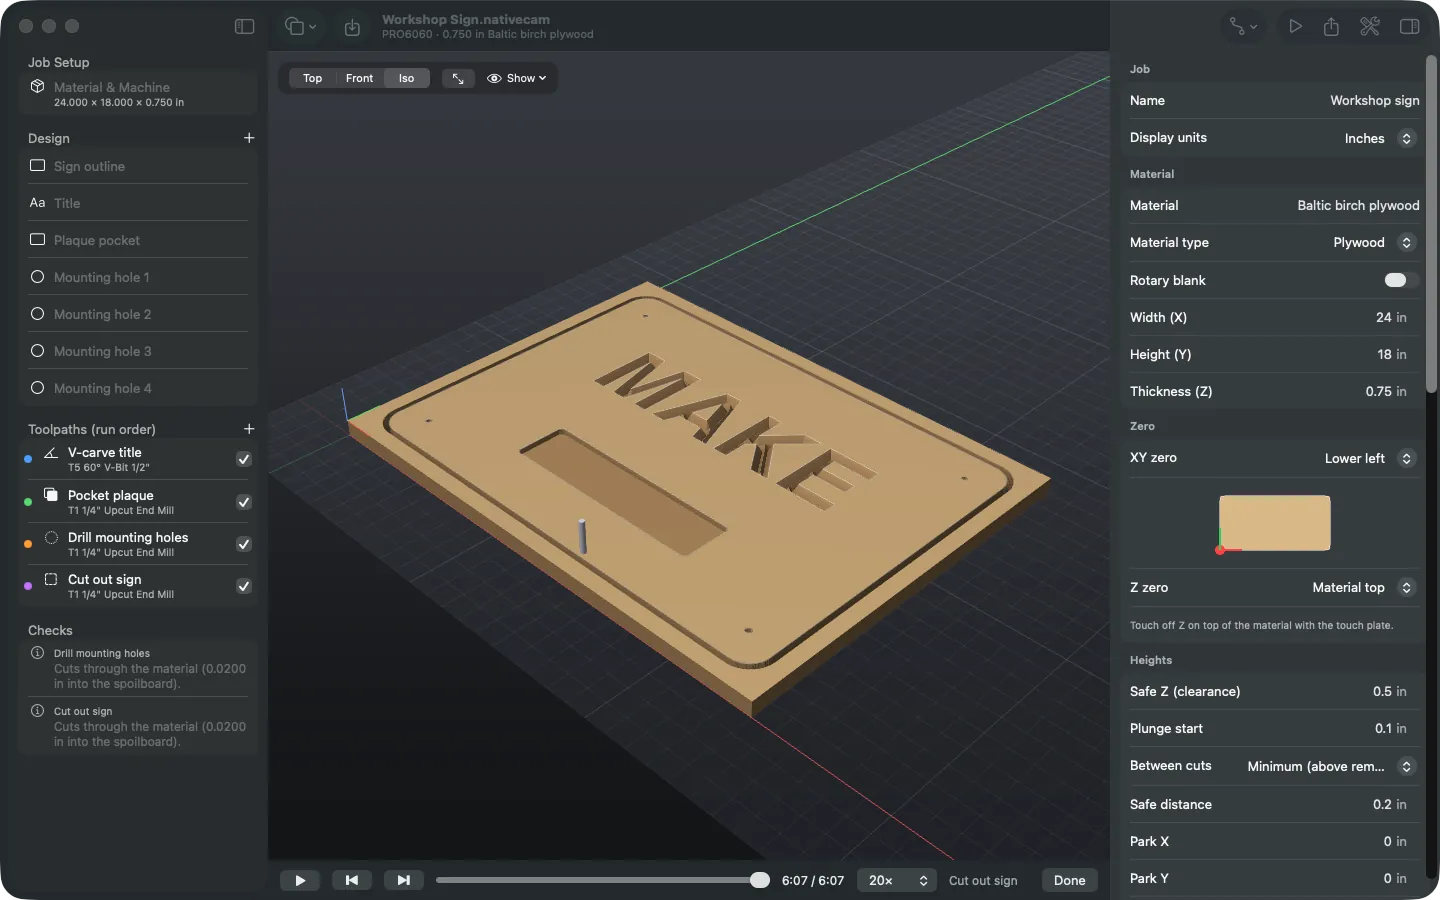
Choose File ▸ New Demo Sign Project. A new window opens with a 24 × 18 inch sheet of ¾ inch Baltic birch plywood, the sign's shapes and four toolpaths already set up. Save it anywhere with ⌘S.
The window has three parts. The sidebar on the left lists Job Setup, the Design (your shapes), the Toolpaths in the order they'll run, and any Checks. The canvas in the middle shows the material and toolpaths in 3D; drag to orbit, pinch or scroll to zoom, and press ⌘1, ⌘2 or ⌘3 for top, front or iso views. The inspector on the right edits whatever is selected.
-
Make it yours
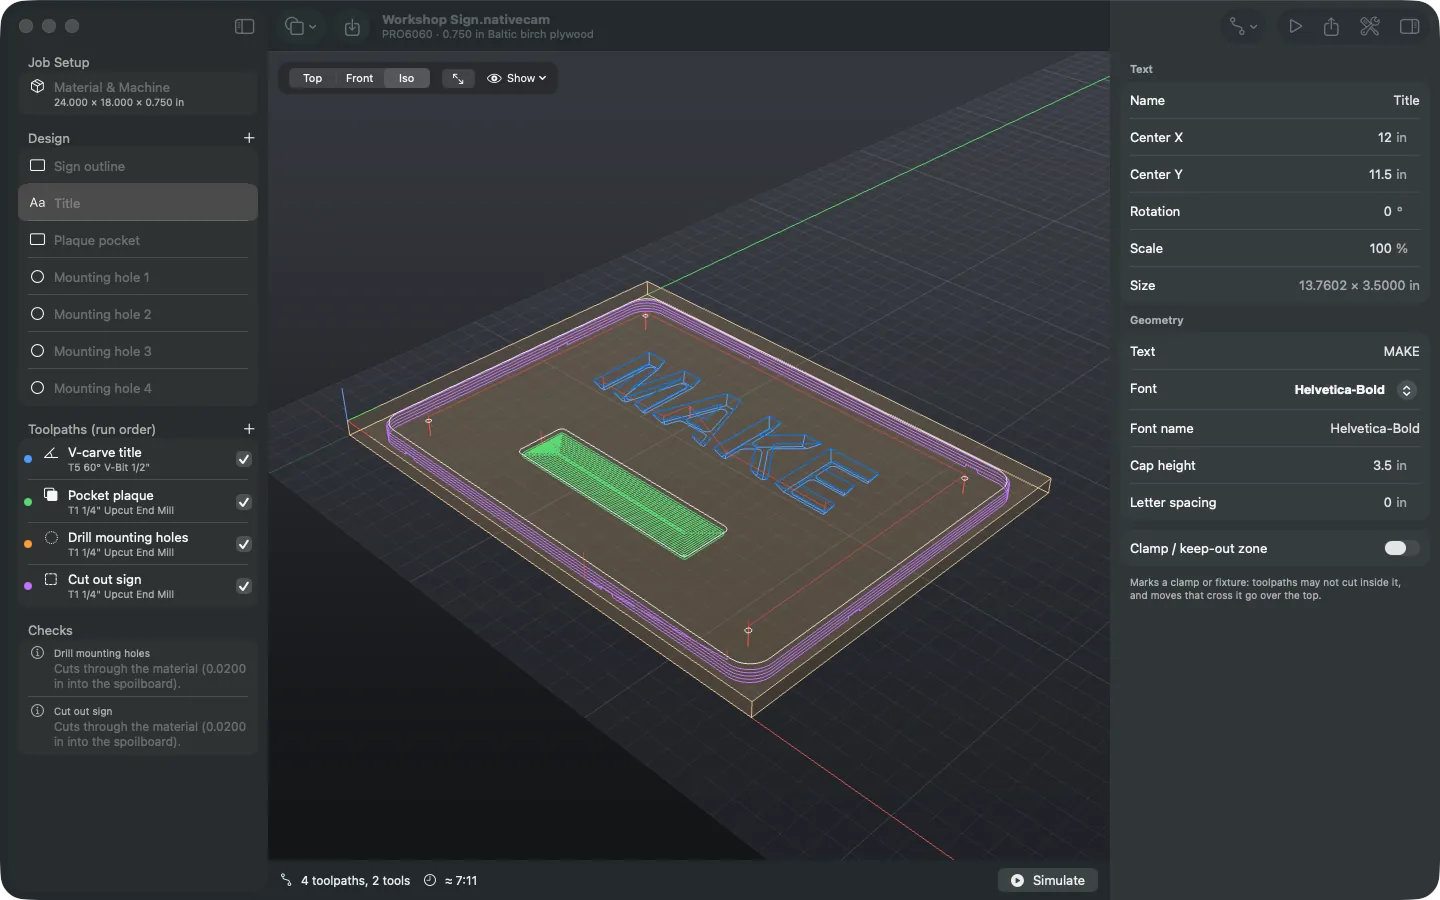
Click Title in the Design list, then change Text in the inspector. We used MAKE. Any installed macOS font works, and the cap height sets the letter size. The V-carve toolpath follows the new text.
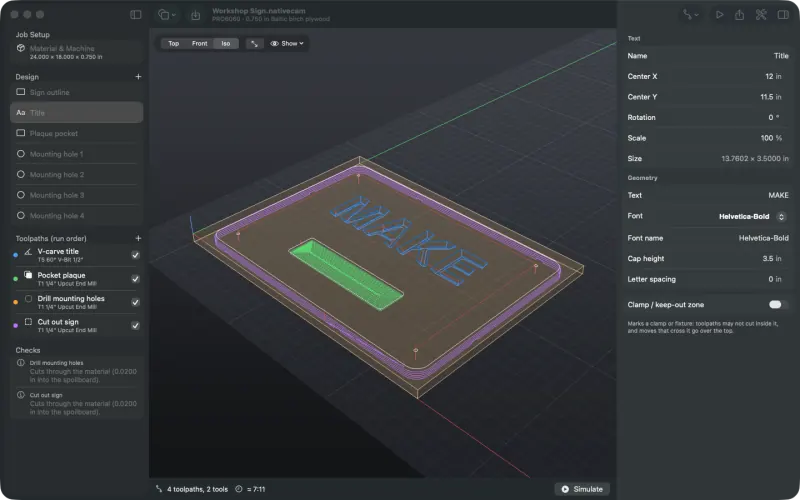
The Title shape selected: its text, font and size are in the inspector. -
Check the material and zero
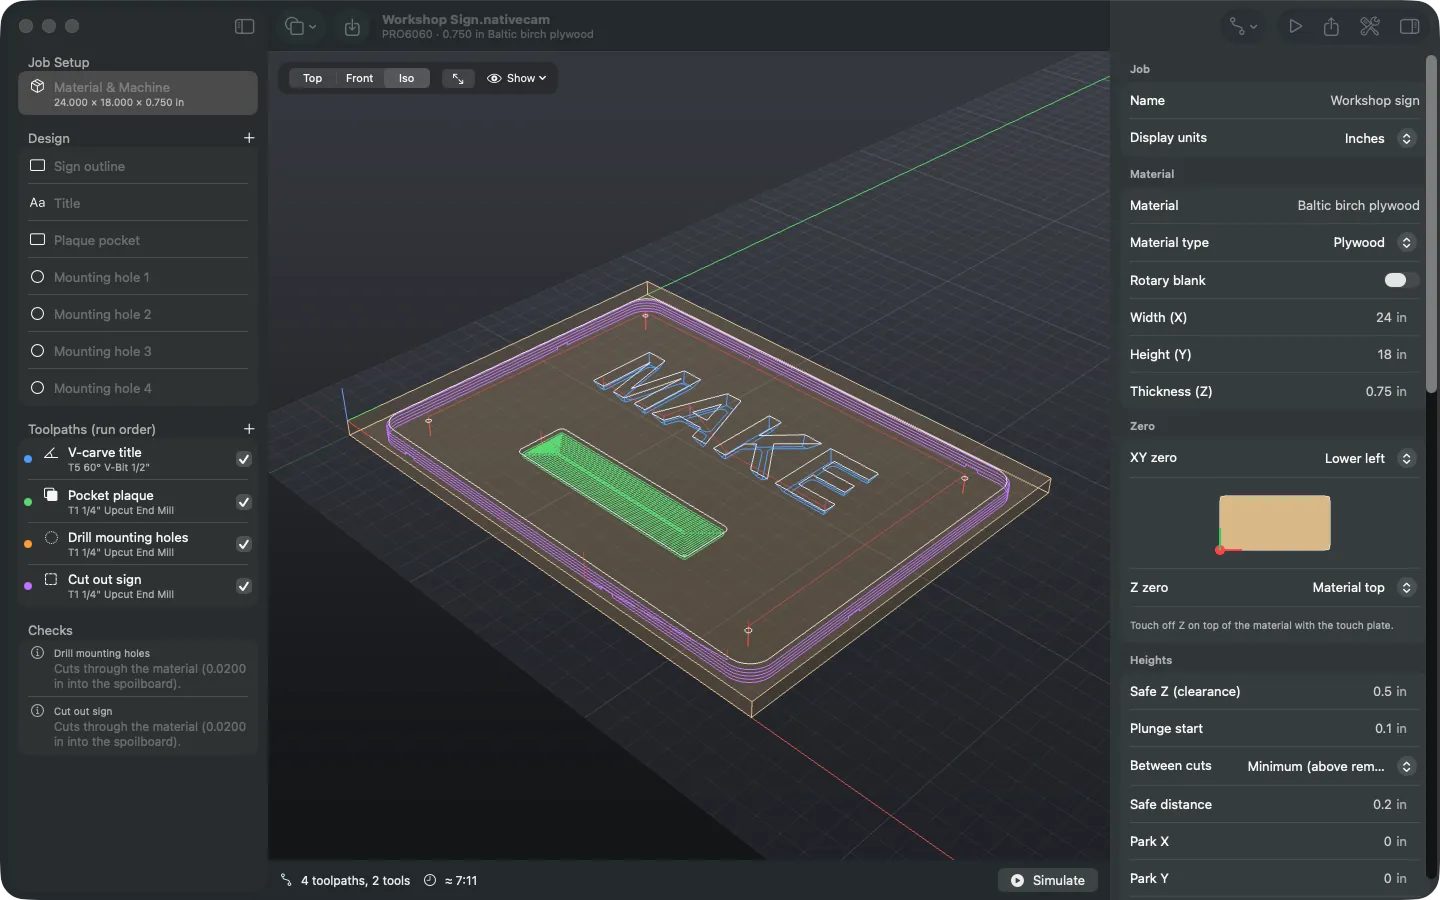
Click Material & Machine at the top of the sidebar. The inspector shows the material size and thickness, where X/Y zero is (the lower-left corner here) and where Z zero is (the top of the material). Below those are the safe height, the plunge height, how the tool moves between cuts, and the park position.
Further down, Machine is the router this job will be posted for. New documents start on an Avid PRO6060 with Mach4; set up your own machine before you export for real.
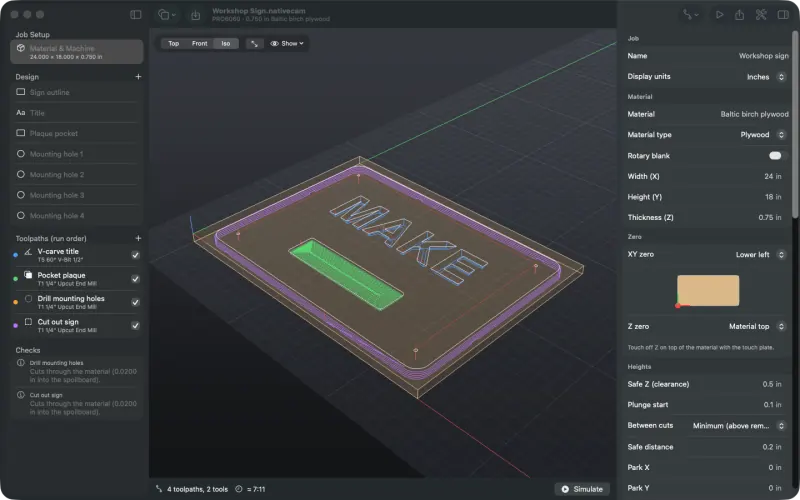
Material & Machine selected. The diagram under XY zero shows where the origin is. -
Look at the bits
Press ⇧⌘T to open the Tool Library. The sign uses T5, a 60° V-bit, for the lettering and T1, a ¼ inch upcut end mill, for everything else. Each bit has its geometry, flute count and direction, feeds and speeds, and a drawing to check against the real one. Edit the numbers to match your own bits.
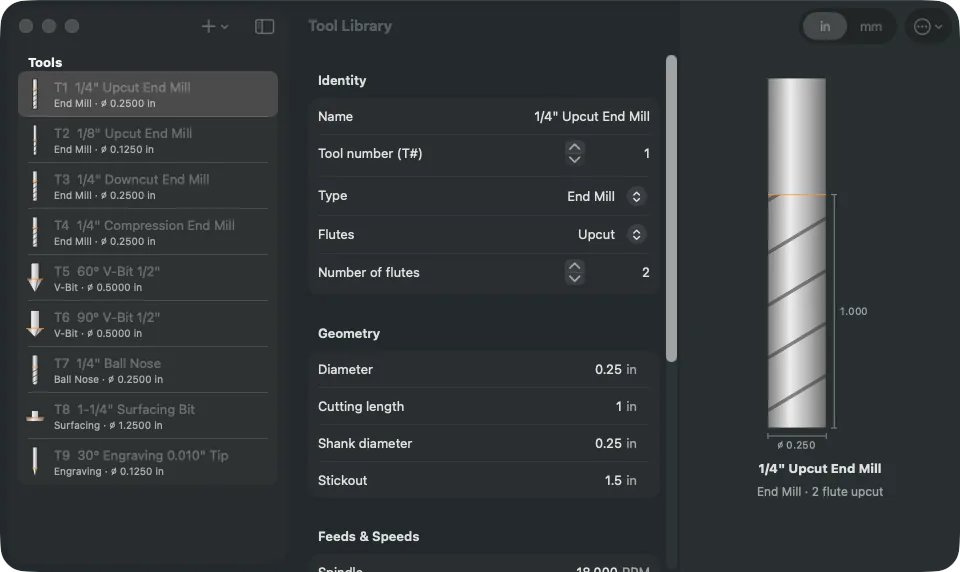
The starter library. Bits can also be imported from Fusion 360 and Vectric libraries. -
Review the toolpaths
Click each toolpath in the sidebar to see its settings:
- V-carve title carves the letters with the V-bit, deeper where the strokes are wider.
- Pocket plaque clears a recessed panel ¼ inch deep with offset passes.
- Drill mounting holes pecks four holes through the sheet.
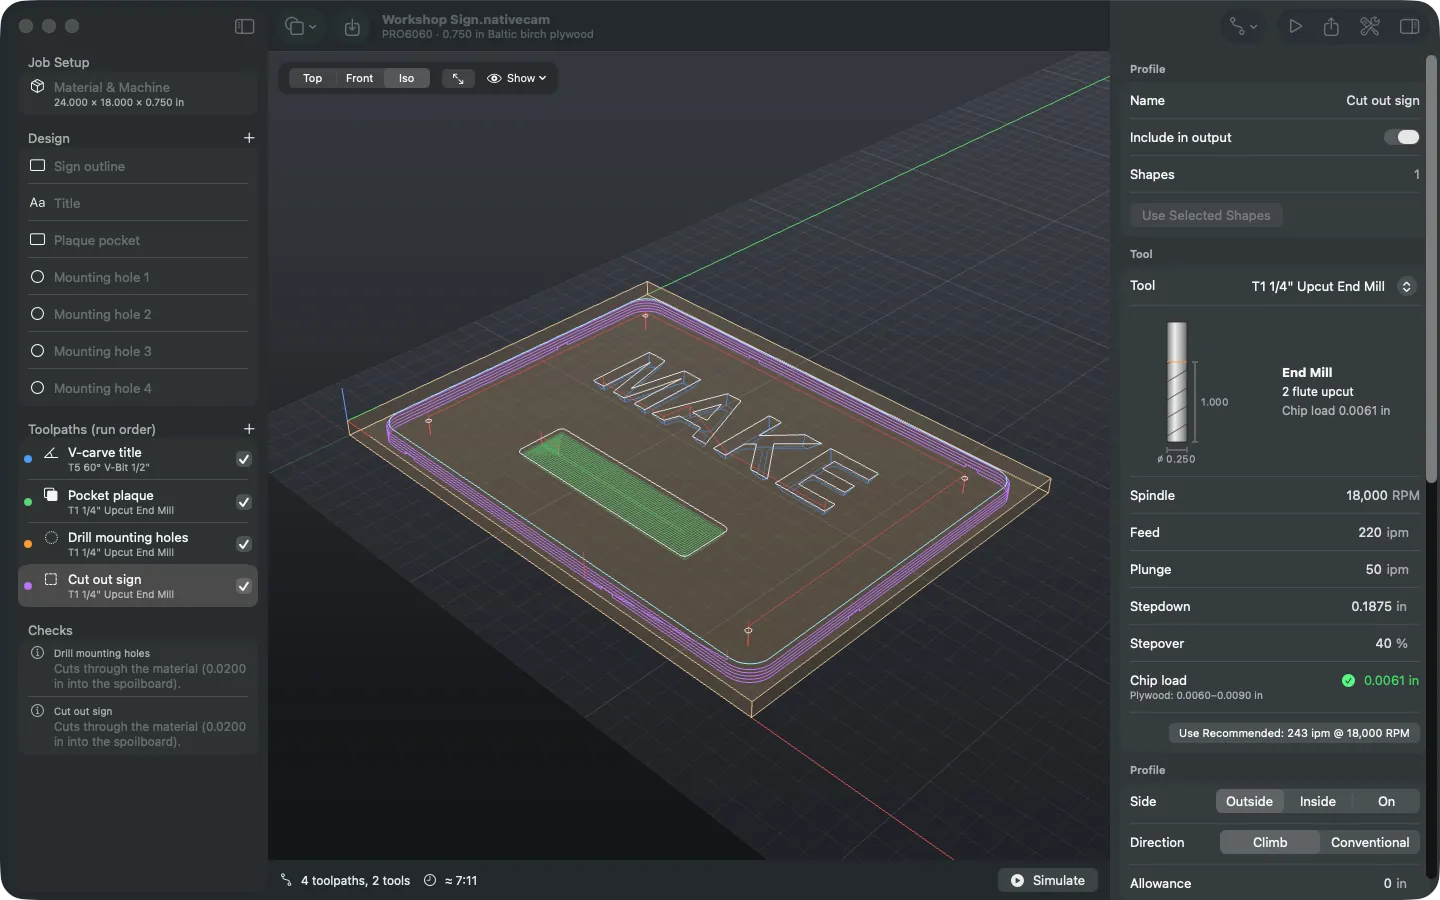
- Cut out sign profiles around the outside in five passes with a ramp entry and six tabs to hold the sign in place. The cut depth is the thickness plus 0.02 inch, so it cuts cleanly through into the spoilboard.
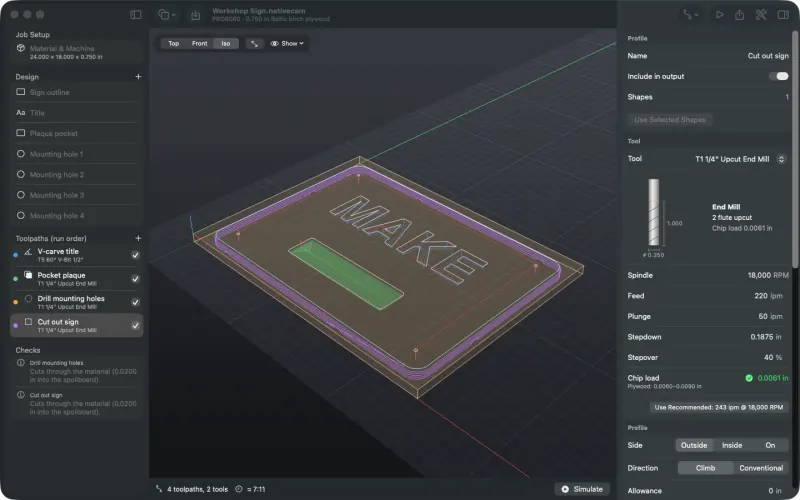
The cut-out profile. The chip load is checked against the range for plywood, and Use Recommended sets a feed inside it. The status bar under the canvas shows the number of toolpaths and tools and the estimated run time, about 7 minutes for this job.
-
Read the checks
Anything worth knowing appears under Checks in the sidebar as you edit. Here there are two notes: the drill and the cut-out go 0.02 inch into the spoilboard, which is intended. Warnings and errors would include cuts into a clamp, a cut deeper than the bit's flutes, a toolpath outside the machine's travel, or a chip load too thin for the material.
-
Simulate it
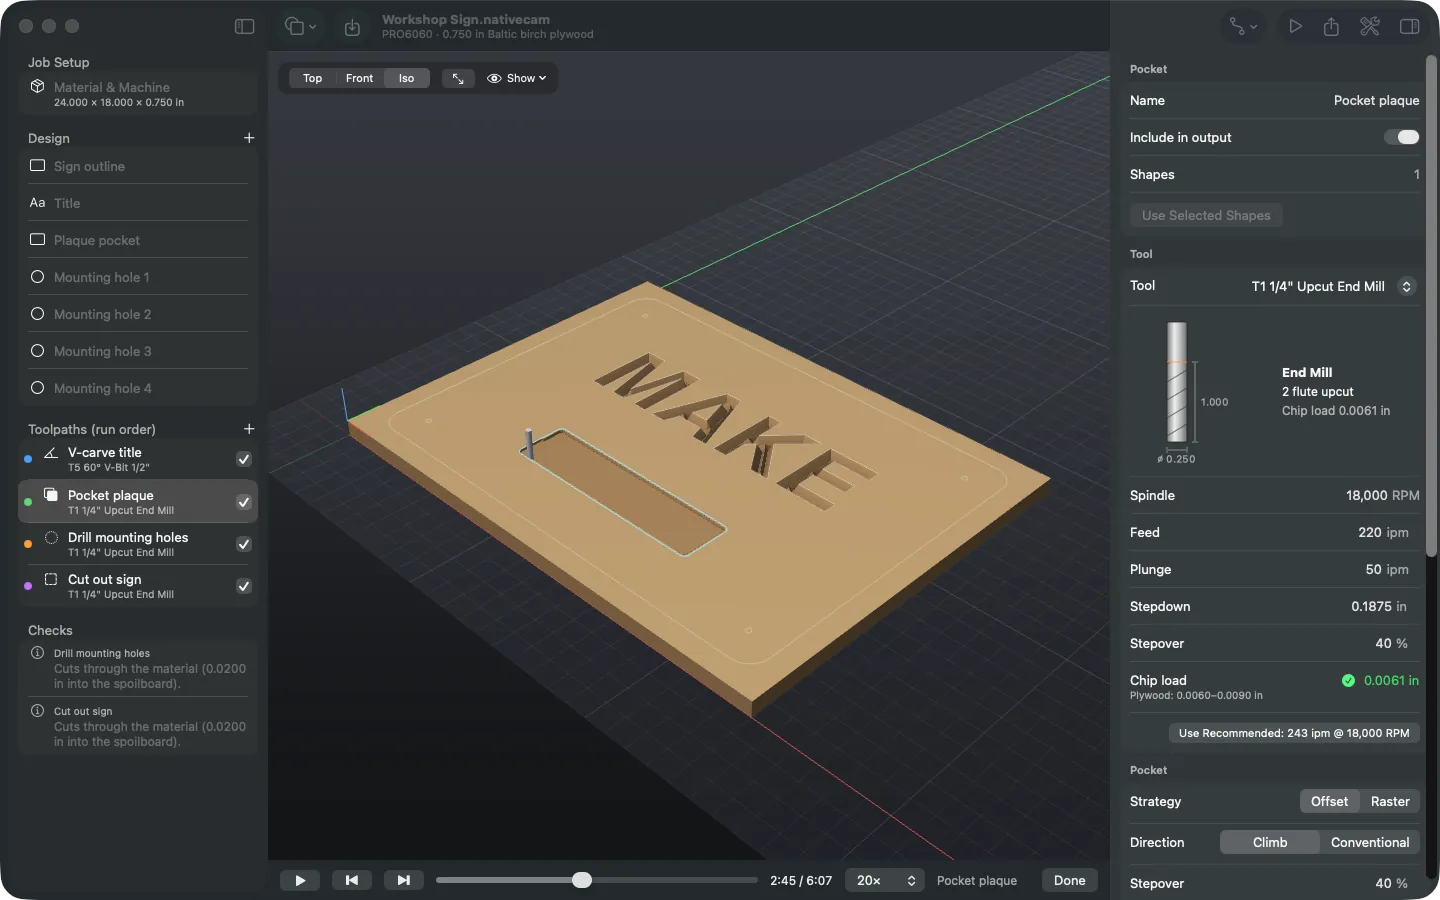
Press ⌘R. The simulator carves the material with each bit's real shape, in run order and timed like the real job. Use the controls under the canvas to play, pause and step between toolpaths, drag the timeline to scrub, and change the speed. ⌘. or Done leaves the simulation.
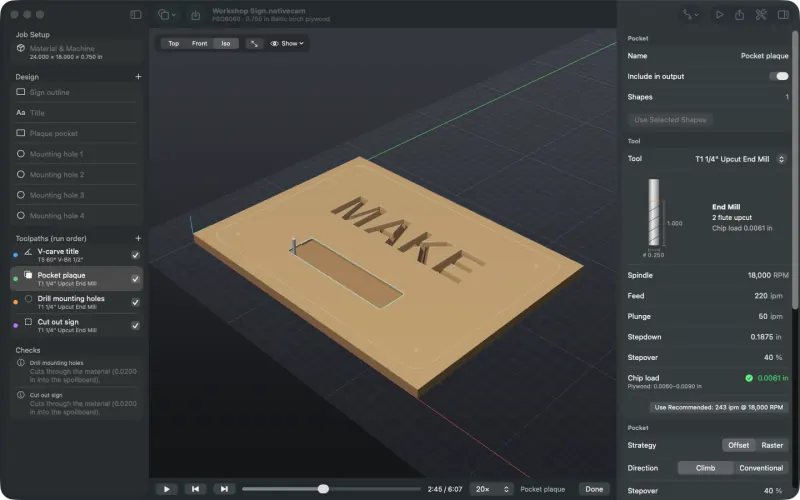
Part way through: the lettering is carved and the pocket is being cleared. 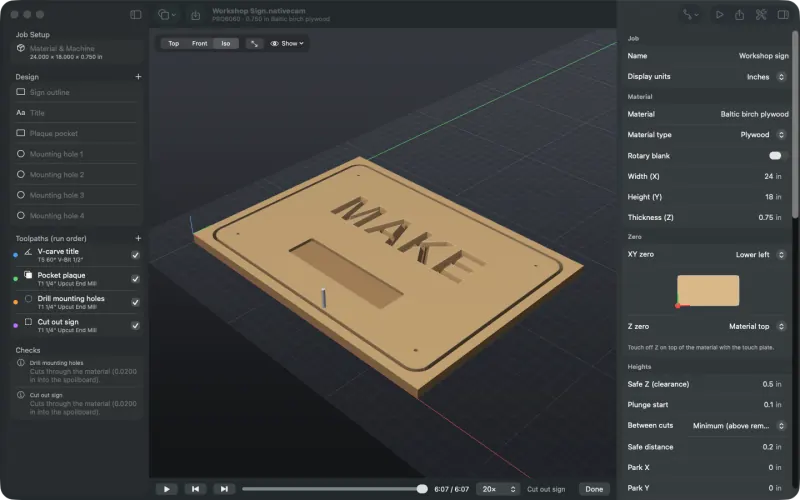
The finished sign. Look closely at the tabs, the pocket floor and the depth of the lettering. -
Export the G-code
Press ⌘E. Before the save panel appears, NativeCAM posts the job and reads the file back, checking it against the controller's rules, against the toolpaths move by move, and against the machine's travel. Problems are listed for you to confirm; then you save a
.tapfile for Mach4 (or.nc,.ngc,.sbpand so on, depending on the controller).The start of the file for this job, with a few header comments left out:
(Workshop sign)
(Post: Avid CNC Mach4 - NativeCAM 0.1)
(Machine: PRO6060 {5 x 5 ft}, spindle, Manual {M6})
(Material: Baltic birch plywood X=24.0000 Y=18.0000 Z=0.7500 in)
(Z zero: Material top   XY zero: Lower left)
(Program extents: X0.8750 to X23.1250  Y0.8750 to Y17.1250  Z-0.7700 to Z0.1000)
(Safe Z = 0.5000)
(Tools used:)
(  T5 60deg V-Bit 1/2in - D0.5000 V-Bit)
(  T1 1/4in Upcut End Mill - D0.2500 End Mill)
G00 G94 G20 G17 G90 G40 G49 G80
G91.1
G64
(Change to Tool: T5 60deg V-Bit 1/2in)
T5M6
M07
S18000 M03
(Toolpath: V-carve title  Tool: T5 60deg V-Bit 1/2in)
G00 Z0.5000
G00 X5.7965 Y9.7549
G00 Z0.1000
G01 Z-0.0085 F30.0
Also save an air cut with File ▸ Export Air Cut… (⌥⌘E): the same program with every Z raised by the amount you choose, so the machine traces the job above the material. File ▸ Export Setup Sheet… saves a printable page with the zero, tools in loading order and the run order. Here's the setup sheet for this sign.
-
At the machine
Load the file on your controller. Put the first bit (the V-bit) in the spindle, zero X and Y at the lower-left corner of the sheet, and touch off Z on top of the material. Run the air cut first and watch for anything unexpected, then run the real file. At the tool change the file retracts, stops the spindle and calls
T1M6, and Avid's M6 macro stops for you to swap to the end mill and re-zero Z with the touch plate.Air-cut every new program, keep a hand near the E-stop, and don't leave the machine running unattended. If your controller isn't Avid Mach4, run its acceptance test before your first real job.