Tutorials › 2
Set up your machine
The setup assistant asks the questions that decide whether a G-code file runs correctly on your router, then tells you in plain language what NativeCAM will write.
-
Open the assistant
Choose Settings ▸ Machine ▸ Set Up a Machine…, or use the Machine menu in a document's Job Setup. The assistant has four steps; Back and Next move between them.
-
Pick your machine
Search or scroll the catalogue: 37 hobby and prosumer routers from 20 makers, each listed with its size and controller. Pick your model and size. If yours isn't there, choose Generic machine and enter its travel later.
Every catalogue value has a source: the maker's published specs, the controller settings the maker ships, or a labelled estimate. Only the developer's own Avid PRO 6060 is marked Tested.
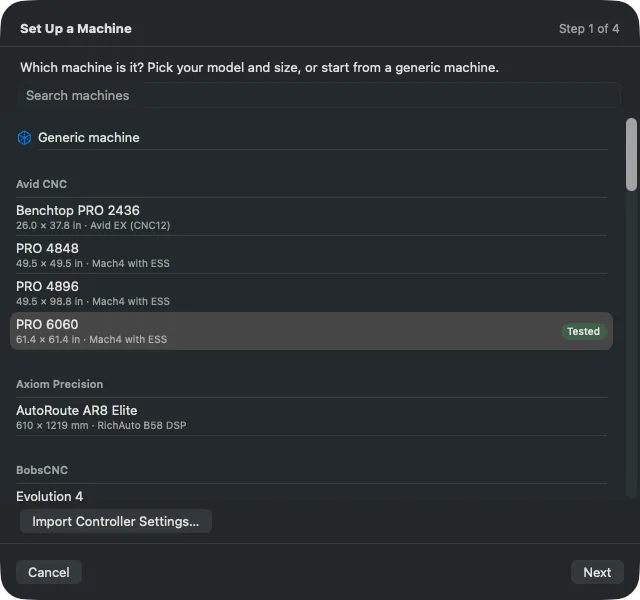
Step 1. Import Controller Settings… at the bottom reads your controller's own files instead. -
Choose the controller
Many machines can run more than one controller, and a wrong choice here is the most common way to get G-code a machine misreads. An Avid PRO can run Mach4 or the newer Avid EX (Centroid CNC12); a Shapeoko can run Carbide Motion or Grbl through gSender.
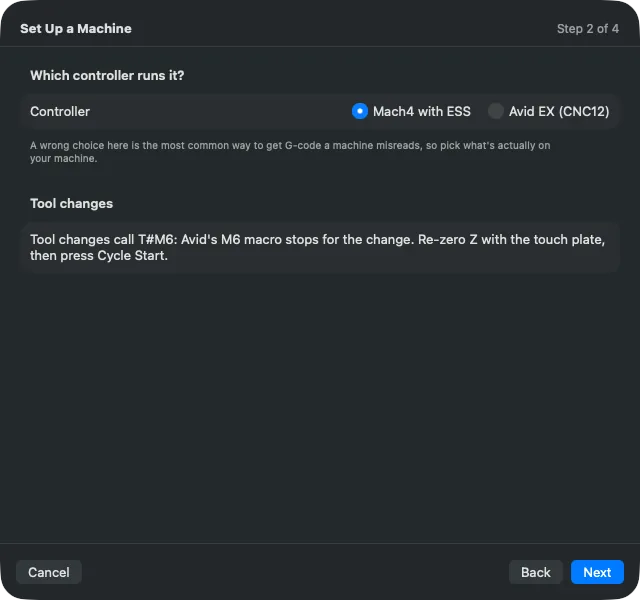
Avid PRO: Mach4 or Avid EX. 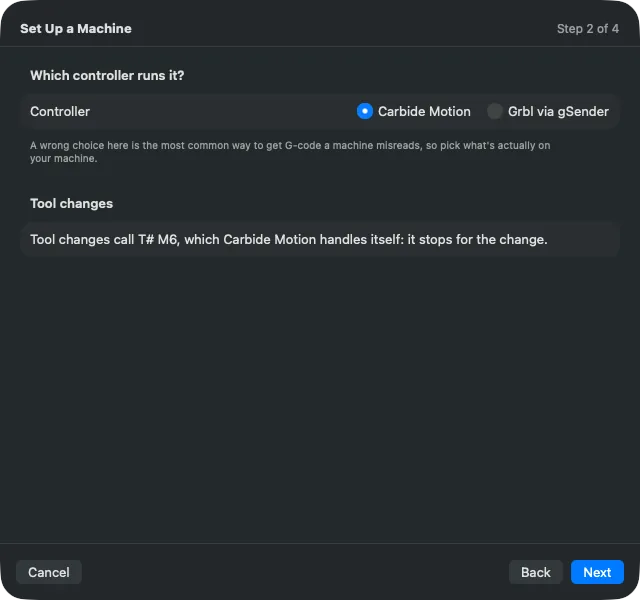
Shapeoko: Carbide Motion or Grbl via gSender. For Grbl machines the assistant also asks which program sends the files, because stock Grbl rejects
M6but keeps running the lines after it, so the next tool's cuts would run with the old bit. NativeCAM only writesT# M6where something stops for it: Carbide Motion, a tool changer, or gSender or CNCjs set to pause. Otherwise each tool gets its own file, as Vectric does for Grbl.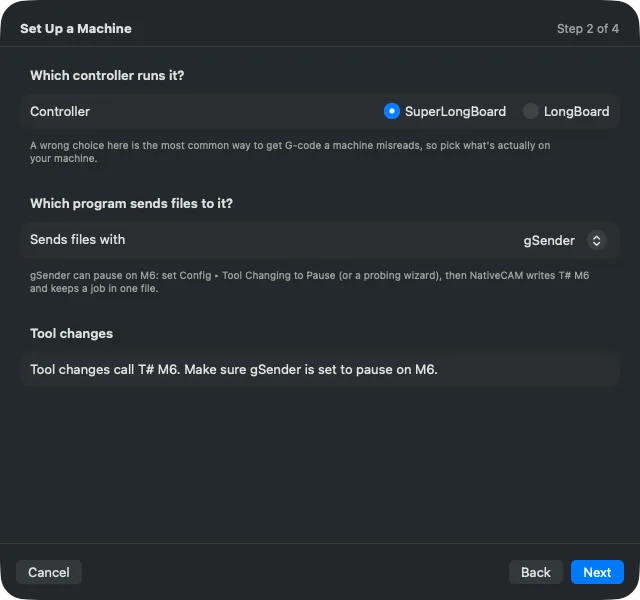
A LongMill sending with gSender: set gSender to pause on M6 and the job stays in one file. -
Units, tool changes, spindle
Choose the G-code units your controller runs in. Controllers don't convert units, so the file must match. Then say how tools change (by hand with M6 and a touch plate, by hand with an M0 pause, or with an automatic tool changer), what spindle or router you have, and whether a dust collector is switched from an output.
For a custom machine, enter its travel here. You can also import Grbl
$output or a Mach4Machine.inion this step for your machine's real speeds and accelerations.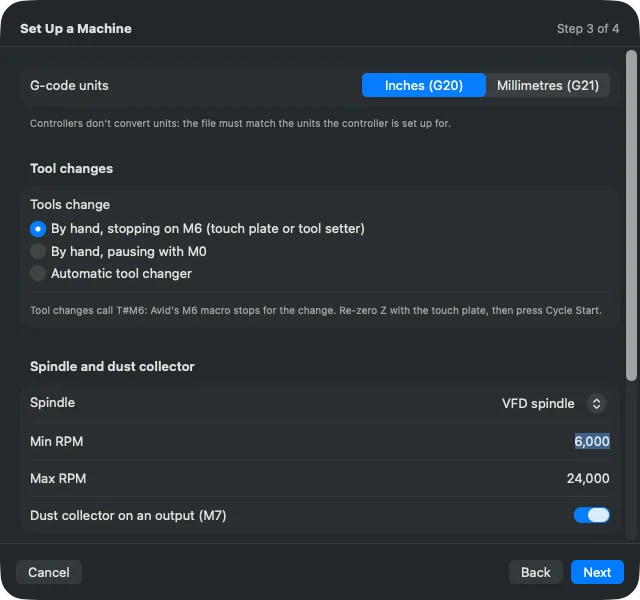
Step 3 for the Avid PRO 6060 on Mach4. -
Read the summary and save
The last step describes what NativeCAM will write for this machine, in plain language, with a preview of its acceptance test program. Read it; if anything is wrong, go back. Name the machine and click Finish.
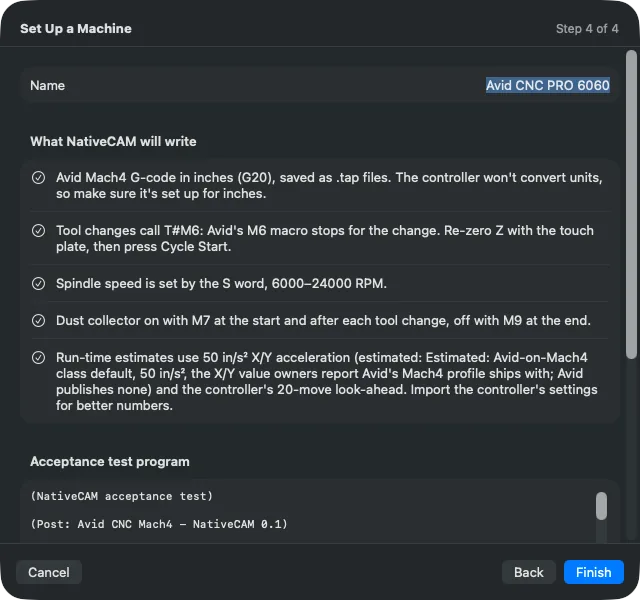
Avid PRO 6060 on Mach4. 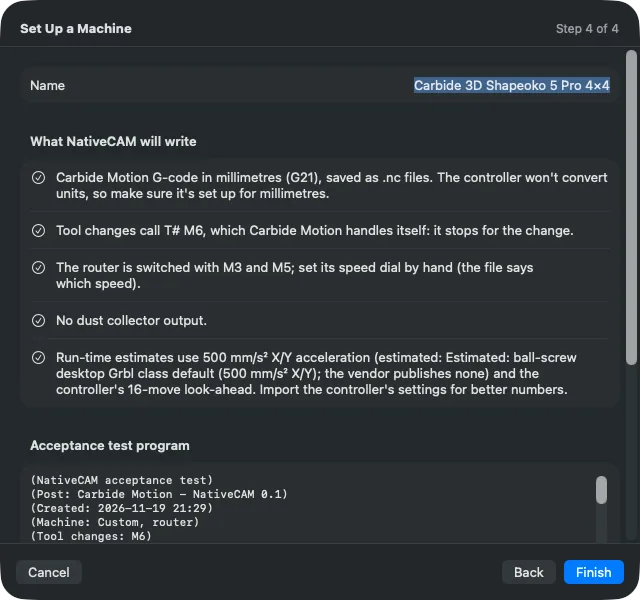
Shapeoko 5 Pro on Carbide Motion. The machine goes into your machine library. Settings ▸ Machine lists saved machines and picks the one new documents start with. Each document keeps its own copy, so it posts the same G-code later, and Job Setup offers the library's newer settings when a saved machine changes.
-
Import your controller's settings (recommended)
Makers almost never publish acceleration, so catalogue values are class defaults until you import your controller's own settings. In Material & Machine ▸ Motion, use Import Controller Settings… (or Paste Grbl $…). A sheet shows each value next to the current one, with where it came from, and you pick which to apply. Run-time estimates use the result.
-
Run the acceptance test
The acceptance program has a square, circles from 1 to 50 mm radius in all four quadrants, a helix, a 3-second dwell and two tool changes. Save it from the summary page, then run it in check mode where your controller has one (Grbl's
$C), then as an air cut, then 0.5 mm deep in scrap. Measure the circles: unit and arc errors show up in their sizes, and re-zero errors in the depth after each tool change.swift run -c release nativecam-cli acceptance --controller grbl --sender gSender --units mmOnly Avid Mach4 output has run on a real machine so far. For every other controller, treat NativeCAM's output as unverified until you've run the acceptance test. If it works (or doesn't), please report the result.